If you installed UiPath Orchestrator 2020.4 or later and need specific settings for your SAML provider to work, there is a useful workaround.
UiPath Orchestrator 2020.4 installs three web applications by default: Orchestrator, WebHooks, and Identity Server. Identity Server is where the host admin configures the external identity providers such as Windows or Google. It also supports SAML 2.0.
The options for configuring SAML in the Identity Server UI cover the majority of cases. However, there are some settings that are not covered. While this is something we’re looking to fix in future releases, there is a way to specify extra settings in already released versions (such as 2020.4 and 2020.10).
UiPath’s Identity Server uses the SustainSys.Saml2 library, which takes a XML configuration file. The full list of settings are available on their documentation site.
Start by making sure the SAML external identity provider is configured and enabled in the host admin page. Make sure the External user mapping strategy is set correctly.
Next, edit the appsettings.json or appsettings.Production.json file to include the following section at the root level:
|
|
This tells Identity Server to look for a file called saml2.xml in the same folder as the web application and the appsettings.json.
Next, create an XML file called saml2.xml and add the SAML configuration. Here is an image of the external identity provider config page with the fields labeled.
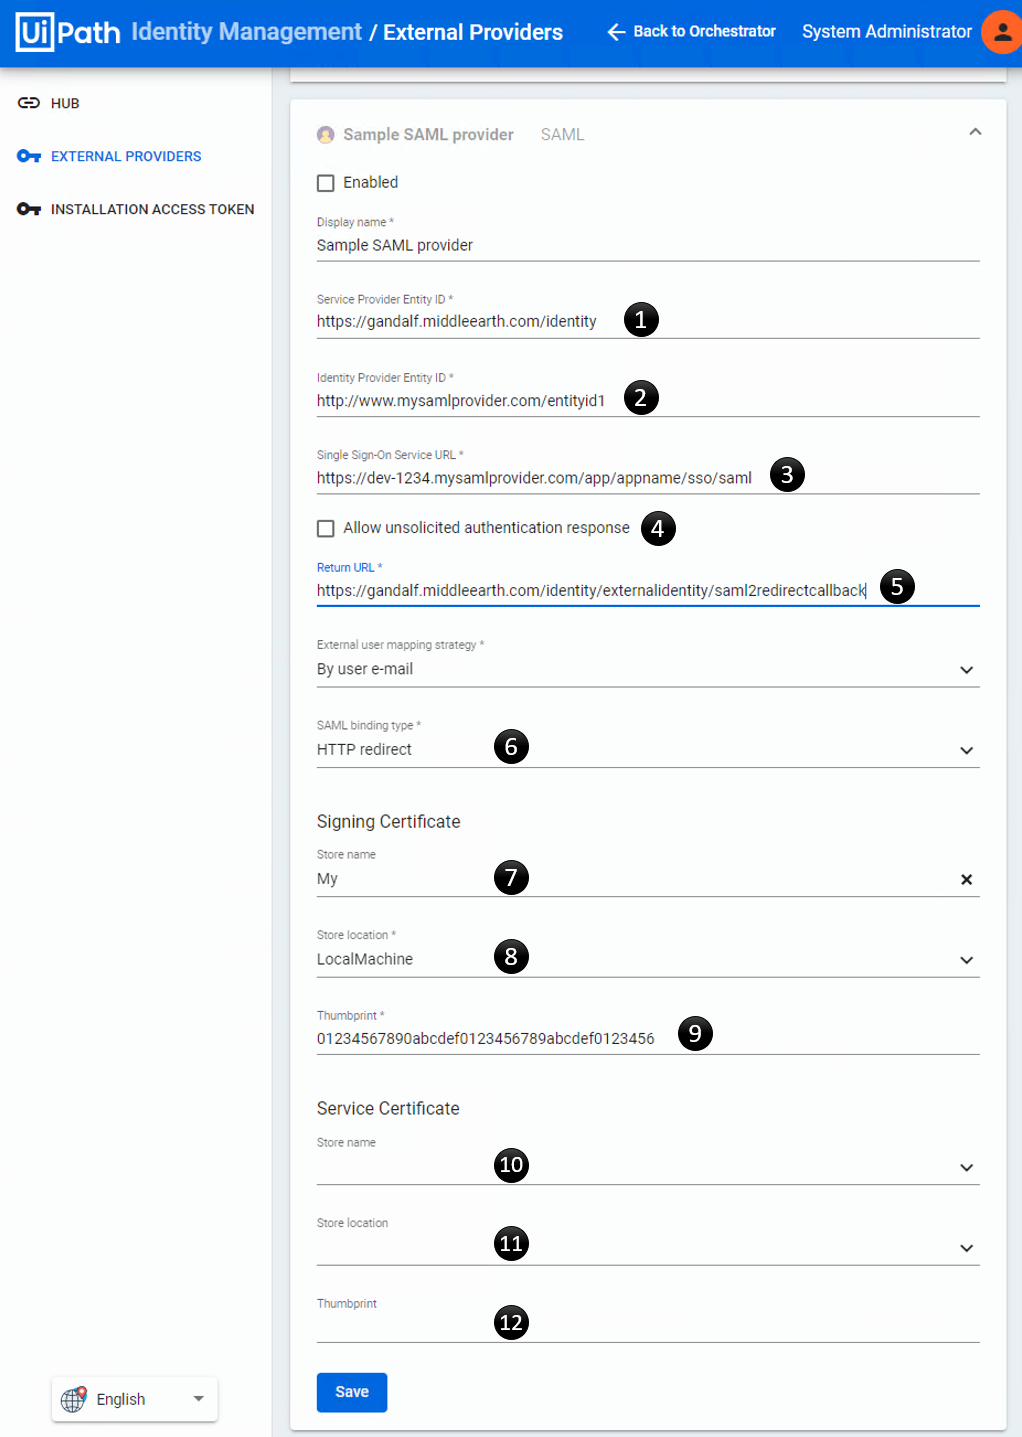
Map the fields from the page above to the corresponding nodes in the saml2.xml:
|
|
Add the settings that you need. For example use publicOrigin in load-balanced scenarios (to be fixed soon) or
use minIncomingSigningAlgorithm if you want something other than the SHA256 default.
Save the files and restart the Identity Server web application in IIS. If there are any errors encountered with the SAML configuration, there should be error events in your logs (Windows Event Viewer by default).